Showing posts with label Nails. Show all posts

Saturday, 9 May 2015

Sally Hansen Nail Growth Treatments


After trying and loving the Sally Hansen Nail Growth Miracle Serum (which I have reviewed here) I thought I would try more products within the Sally Hansen Nail Growth range. I picked up the Vita Surge Growth Gel Treatment and the Nail Growth Miracle Growth Treatment and thought I would use them both together.

The Vita Surge Growth Gel is a green gel containing blue Vitamin A microbeads. I apply a thin layer of this to each nail and massage in to my nail and cuticle bed. I find that this is really hydrating and love to carry this around in my bag so I can apply it 2-3 times a day.

The Nail Growth Miracle Growth Treatment is a clear varnish which I have been using after applying the gel. This says that it can be applied over coloured nail varnish so is great for you girls who always paint their nails. This dries really quickly and leaves nails looking beautifully shiny, but I find that the varnish starts to peel within a few hours and doesn't last a full day out.

My favourite of the two is definitely the Vita Surge gel. As I massage this in, this takes less time to apply than the polish which of course needs a few minutes to dry. As the polish peels I feel that the nail growth I have achieved has been due to the gel. However, after using these products for over a week and a half, I must say that I am slightly disappointed. The Miracle Serum I used originally was definitely more effective and I found that my nails looked healthier too, which for someone with really short nails, I was really chuffed about.

I won't be repurchasing these unfortunately and in future I will definitely be sticking to the Miracle Serum.

Have you used any of the Sally Hansen growth treatments? Do you have any tips for someone who is trying to quit a life long addiction to nail biting?


Tuesday, 28 April 2015

Illamasqua Nail Varnish Review


On a spur of the moment trip to TK Maxx a few days ago, I happened to spot these two Illamasqua nail varnishes in a set in the reduced beauty section for £5. I couldn't believe my luck because these babies usually retail at £30 for a duo set!

I absolutely love the purpley-black glittery polish and find that the glitter is noticeable but subtle, so isn't too in your face and is perfect for day or night. The teal polish is an absolutely stunning metallic shade, and this photo definitely doesn't do either polish justice. I think these will be perfect for Autumn/Winter time. I have worn both colours and find that the polish applies beautifully and one coat would be enough, although with the glittery colour I think two coats looks prettier. These didn't chip for several days and I was really impressed with their lasting appeal. I have never tried high end nail varnishes before and usually stick to Barry M or Ciate, but I will definitely be on the hunt for more Illamasqua nail varnishes in the future.

Monday, 13 April 2015

Beauty Wishlist

After asking all of my Twitter followers what their favourites blog posts are, several said that they love reading Wishlist posts. So I thought I would share with you the beauty products I am lusting over most at the moment. I swear as soon as I work my way down the list and starting purchasing things I just end up adding more and more! 


Amazing Cosmetics Concealer
Bourjois Rouge Edition Velvet - #10 Don't Pink of It
Bourjois Healthy Mix Foundation


MAC Lipsticks in (from left to right)
 Lady Danger
Brave
Vegas Volt


Models Own Chrome Nail Varnish in 'Rose Gold' 
Urban Decay All Nighter Make Up Setting Spray
Benefit Watt's Up! Highlighter

What are you lusting after this month? If you have used any of the products on my wishlist, would you recommend them? 

Friday, 2 January 2015

Avon Magnetic Nail Varnish


The Avon nail range is amazing in my opinion. In the last year or so they have really jumped on board the Nail Art trend, offering a variety of polishes and tools/brushes at an affordable price.

Their magnetic range is as extensive as most other high street nail brands, offering a beautiful variety of metallic colours with something for everyone. I love how the magnetic wands are sold separately, so you can choose the pattern you wish to recreate. 

I already own several colours and wands, but this is the Hypnotic Bronze polish and Star Magnetic Wand which I received as a gift from my parents for Christmas. I love the shade and think it's perfect for any skin tone. 

I definitely recommend checking out the Nail section in an Avon catalogue if you can get your hands on one. I've ordered one of the new brushes which is on offer at the moment, so I will hopefully share a review of that soon! 

Monday, 29 December 2014

Frozen Inspired Nails


It wasn't until these were dry that I thought they looked like something Elsa from Frozen would have. I just generally love both blue and glittery polishes, and I'm really pleased with how these have turned out, even if it wasn't my intention to create Frozen inspired nails! 

I used Ciate Pepperminty for the base topped off with Ciate Snow Globe which is one of my favourite glitter polishes. The large clear chunks of glitter look beautiful in the light and make my nails look icy, which is perfect for this cold and frosty spell of weather we have been having over the past few days here in Lincolnshire! 


Wednesday, 24 December 2014

Ciate Christmas Nail Advent Calendar

After opening the final door on my Ciate Advent Calendar, I thought I would share the full 24 polishes with you in case you are considering purchasing one of the advent calendars for next year. I'm really happy with the contents of my advent calendar, and I've already bought another one in the sale ready for next year because I think they are so pretty and really great value for money. The variety of colours you receive, and the fact you receive two of the Ciate Caviar Pearls as well as a full size polish on Christmas Eve, makes this my favourite beauty advent calendar on the market.


 Sequin Miss Mistletoe - Encore! - Glitter Jingle Belle - Amazing Gracie - Ferris Wheel - Confetti


Party shoes - Ivory queen - Kiss Chase - Underwear (Base Coat) - Speed Coat (Top coat) - Boudoir


Pepperminty - Members Only - Pillow Fight - Snow Globe - CaviarPearls Frost Yourself - Hopscotch


Fit for a Queen - ChistmasTree CaviarPearls - FullSize Serendipity - Sugar Plum - Locket - Play Date


Behind each door, there is a quote as well which I think is super cute! Here is a photo of me opening my final door today on Christmas eve!

Which advent calendar did you have this year? Were you pleased with the contents?

Happy Christmas Eve everyone, and I hope you have a very merry Christmas tomorrow! 


Thursday, 18 December 2014

Bargain Ciate Nail Advent Calendar


Today I just happened to pop into my local TK Maxx while running a few errands, and my eyes were almost magnetically drawn like a magpie to a Ciate Christmas display! I wanted to buy it all, but the highlight for me was definitely the Ciate Mini Mani Manor House Advent Calendar.

I purchased this for £24.99, and this is currently retailing at £49! I know it's nearly Christmas now, but for what you get this is such good value! They are mini pots with one full size pot, but I actually prefer that because I have so many nail varnishes and find they all dry out before I get to use them, so I actually prefer having lots of mini pots. 

I would much rather buy them in the sale or while they are on offer and put them away for a few months, rather than pay the full retail price. I was quite disappointed this year by how expensive the beauty advent calendars were, and was sceptical of the make up ones because I'm so fussy with lip colours, eyeshadows and I'm so ridiculously pale I was worried I wouldn't end up using half of the stuff.

For me, these advent calendars are perfect. The variety of colours is brilliant and they are genuinely nice colours, rather than making an advent calendar of all of the colours they couldn't sell, if that makes sense. The packaging as well is SO CUTE and remembers me of Benefit Cosmetics/ Ted Baker's Christmas Gift Sets packaging.


The TK Maxx display were also selling the Ciate Candy Cane House for £7.99 which retails at £25.00! It includes four mini Christmassy glitter polishes which are 'Christmas scented'!

It also had a set of six Ciate 'trinket' baubles, which are clear with a Ciate full sized polish in each. For all six they are only charging £12, and they are currently retailing for £8 for one bauble on Ciate's website. So I would definitely recommend heading to your local TK Maxx to try and pick up some bargains - whether for yourself, or for the perfect Christmas presents!

I am putting this advent calendar away for next year - but am so tempted to open it already! Which advent calendar have you had this year? Were you pleased with the contents?


Wednesday, 17 December 2014

Easy Christmas Nails


In previous years, I've been known to attempt some really elaborate over the top Christmassy nail art that has taken me HOURS. Unfortunately this year, I haven't had a lot of free time, and I've also been having Gel Nails whenever I'm home, so I only really have to paint my nails for the few days between my appointments.

Mum's Secret Santa at work bought her this China Glaze red glitter nail varnish, called 'Ruby Pumps' - the photo doesn't do it justice, it reminds me of Dorothy's shoes from the Wizard of Oz! It looks amazing under the light and I love it because the glitter is very small and thin, and so I only needed two coats in comparison with some of the chunkier glitter polishes (and I imagine it will be a lot easier to remove!)

The snowflake stickers I purchased on eBay about a week ago - if you would like to buy them, you can find the link here. It is only 99p for a sheet of stickers which I think is an absolute bargain, and even though I've only chosen to do one finger on each hand, one sheet would definitely cover all ten if that's what you wanted! There are lots of different designs from that seller, the stickers I used on my nails have the code: 'SN105' from the drop down menu.

They are the easiest things to apply, and then I just sealed it all in with a top coat. The China Glaze polish literally took seconds to dry as well, so this nail design only took me 5 minutes in total, which is great for any of you rushing off to your Christmas party or who doesn't have much spare time at the moment!

What do you think of my simply Christmas nail design? If any of you have posted about your Christmas nails, please post the link below as I would love to have a nosey! 

Friday, 3 October 2014

5 Must Have Nail Polishes for Autumn


I'm one of those girls with boxes upon boxes of nail varnish. I have been doing nail art for about 4 years now, and my family and friends always love when I paint their nails. Which means I always like to have a variety of colours, but also that I'm bought a lot of them as presents, and I also won a Barry M competition once where I won 10! 

I try and be strict when I'm moving back to university, because when your car is full of everything except the kitchen sink, it can be difficult justifying to my Dad why I need two boxes of nail varnish. So I brought a limited number back with me this time, mainly Autumnal colours which I think are perfect for the colder months. Here are my top 5 to share with you all, in case you're in Boots or Superdrug over the next week and fancy treating yourselves! As you can probably tell, I'm a HUGE fan of Barry M when it comes to my nails. I think they are not only extremely affordable, but last well and look amazing.


Barry M 273 Raspberry | This is my favourite of the five I will admit. I love this colour because burgundy is one of my favourite colours, but I also like how this nail varnish varies. If you want a lighter colour, stick to the one coat, but I prefer two which makes it a darker burgundy colour. Even though this is not in their Gel range, it is really shiny and I think it looks nice on either long or short nails


Barry M AQNP3 Caspian 404 | This was released as part of the Barry M Aquarium range earlier in the year. I have several of these polishes, but the gold has been extremely popular among my family and friends of all ages. When light reflects on it, it shimmers pink and blue, which looks really nice. This polish has been great for when I have been working over summer in an office environment, and don't want to have bright nails which aren't really formal or appropriate!


Barry M GNP 3 Watermelon 242 | I won this as part of a Barry M Competition earlier in the year, where you won various Barry M goodies, and in particular the latest Gel and Textured polishes. Teal is one of my favourite colours, and I love these Gel polishes for when I can't afford to have gel nails done professionally. This colour is perhaps a little dark for me considering I'm fairly pale, but it is a great colour nonetheless and one I would definitely recommend


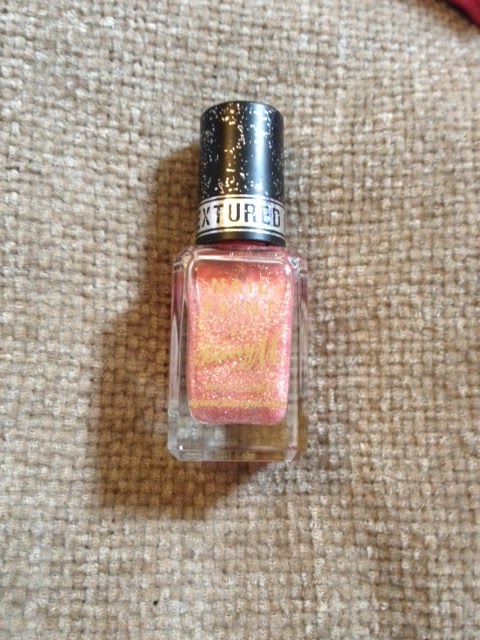
Barry M TNP 5 Princess 337 | This was in fact a present from my four year old niece, who is most definitely a princess in waiting! Pink is her favourite colour, and she loves when I paint her nails, so she probably bought me this with herself in mind! I love the pink glittery colour (apologies that it doesn't photograph well). Just because it is colder doesn't mean our nails HAVE to be darker, and this is great for any celebrations, parties or nights out, or just to add a touch of sparkle to any old day!


Barry M 325 Denim 339 | This was also a gift from my niece for Christmas. I will admit I was a bit sceptical of whether I would like Denim effect nails, but the metallic blue with a hint of glitter is really nice! It's perfect for if you don't want anything too bold, but want a hint of sparkle!


Sunday, 14 September 2014

NOTD: Nails of the Day


Today my Nan asked me to paint her nails, and I just thought I would share the final product with you! My Nan was really happy with them, and they are so easy to do!

Because white nail varnish is always a pain in my opinion, I did two coats covering the full nail in the white nail varnish to ensure it had good coverage. 

After that dried nicely, I then painted the other half of my nail with the lilac colour. Some use a finer nail art brush, but I just literally used the standard Barry M brush it came with.

Once that was dry, I then dripped a fine nail art brush in my glitter polish, and painted the line of glitter on. 

Then, using a dotting tool (or if you don't have one, a pen lid or the end of a hair grip) I dipped it into black nail varnish and painted the dots on. 

I then finished the look with a top coat so hopefully they will last that little longer!

Thursday, 28 August 2014

NOTD: Floral, Polka Dots AND glitter


Today my Nan asked me to pop round so I could paint her nails. It's something she never used to do, but in the last 3-4 years she really loves having them done every now and again.

Today I decided to do a polka dot and floral pattern, with full glitter on one finger on each hand.

I think the flowers in the corner really stand out and give them that extra touch to make them really stand out.

I hope you like them! Can you recommend any other nail art patterns I should try? 

Monday, 18 August 2014

Gift Guide for Girls

This month I have had a lot of female birthdays to buy for. Sometimes I find it so easy shopping for presents, but other times, I really struggle. Here is my quick gift guide for girls around my age (late teens-early twenties). I think these are not only safe bet presents that you just can't go wrong with, but they are also just really really nice.

Gift Guide for Girls


Yankee Candles - By far, the best candles out there in my opinion. There are so many different scents, and it can be difficult buying them for other people, because everyone has their own preference. These candles are not only pretty in their glass jars, but candles are just so relaxing and practical at the same time.

Chocolate - Maybe it's me being a greedy pig who is currently dieting talking, but I don't think you can go far wrong with chocolate. I hate Belgian and Dark, and most posh chocolates actually, but in terms of bars of chocolate, they're a cute little added extra to add to a gift bag.

Bath bombs - This particular bath bomb is from my favourite company, Bomb Cosmetics. They are £2-3 each, but look super pretty and I love receiving them. Everyone loves a good pamper session lets face it!

Ciate nail varnish - I think you're either a nail varnish girl, or you're not. I absolutely love nail varnish, and because I do a lot of nail art, I'm always grateful of receiving new colours. I think these bottles look so cute and the pigmentation is really great.

Ted Baker Make Up Bag - Even if the girl in mind doesn't wear much make up, Ted Baker also does a pretty range of toilletry bags. The material is wipe clean so they won't be ruined easily, and I think they just look classy and expensive.

Tatty Devine Name Necklace - I love these acrylic name necklaces from Tatty Devine. They are about £30, but you can completely personalise the font, colouring, charms, and everything. They make for a really personal and special gift that won't go out of fashion.


I hope you enjoyed this quick gift guide - I'm sorry that yet again, I've been neglecting my blog. I promise I'm working on some new ideas to introduce to you all

Monday, 11 August 2014

Ciate Chalkboard Nails Kit

First of all I want to apologise that my blog has perhaps been a little lack lustre lately. I haven't been able to put the time into it that I really want, what with work experience, starting dissertation research and other family commitments. I promise I'll start putting more time and effort into it soon!

So last week me and Mum fancied a bit of an online splurge, so we headed over to www.fragrancedirect.com. One of the things I ended up buying to try was the Ciate Chalkboard nail art kit. I'd never heard of it before but thought it sounded really different, and I love trying different things with my nails.


I've had a play around with it, and I have to say I really like it! It is a lot of fun and takes only around 5 minutes! Because the black has the chalkboard effect, it literally dries in seconds. I think this is perfect for those who find they have shaky hands and struggle to do much with their nails. As these are just like felt tip pens, it is super easy!

Here is a quick step-by-step of how you use this kit.


1. Paint two layers of the Matte Black polish and let them dry. When it dries, it really looks like a chalkboard, I was so surprised! I'm not sure how they've achieved this but it is cool.

2. To activate the pens, shake them slightly and then press the nib gently against a hard surface until the liquid comes out a little bit. 

3. Then, paint your chosen design on your nails. Here is one of my nails quickly for you to see! I wanted to write in the pens to show you how easy it really is (and I didn't have much time when painting these!)


The colours are super bright and the nails really stand out. They're not something I would wear on an average day, but will be perfect for when I fancy a change, or when I go to fancy dress parties at university as a school girl (they have school fancy dress themed events around 2-3 times a term at my uni!)

This was £6.99 on www.fragrancedirect.com which I think was really reasonable for what you get in the kit.

Have you tried this? Can you recommend any other nail art I could try?

Thursday, 31 July 2014

July Favourites


July has been one busy month! The weather has been gorgeous and I've definitely been making the most of my days. Here is a quick post of my favourite things this month, from absolute lifesaver products sent down from heaven, to those which have just made me an extremely happy girl.

First up is the CND Solar Nail and Cuticle Oil. I suffer with terrible cuticles, they grow so quickly and tend to split so badly they bleed, which in turn stunts my nail growth and makes them very brittle. Rubbing a tiny amount of this oil into my cuticles and nails each day has really made my skin a lot better and my nails a lot stronger.


I am a huge fan of Simple skincare. This Simple Kind to Skin Smoothing Facial Scrub accidentally fell into my basket in Superdrug a few weeks ago and I'm so happy I purchased this. It claims to be a perfect blend of multi-vitamins and a skin-loving exfoliator to remove dead skin cells and keep your skin brighter and more even textured. I can confirm it definitely does what it says on the tin. I use this product once a week on top of the Liz Earle 3 step skincare range, and I've noticed my skin looks a lot brighter and healthier.


This product has been in my make up bag for about a year now, and I will not even consider switching foundations. The Benefit Hello Flawless Oxygen Wow! Brightening Foundation is oil-free and SPF 25, and gives me a fresh, dewy glow, which is the look I love. It definitely makes my skin luminous and healthy looking, and I think it is definitely worth the price of £26.50. I am thinking of trying the Benefit Big Easy in addition to this product, for days when I can't be bothered to paint on a full face, and hope it lives up to my expectations since trying this foundation.


This Maybelline Big Eye Liner has already been reviewed on this blog here and it is definitely one of my favourite products this month. My eyes look a lot bigger and I look more wide awake, which is perfect because I'm not sleeping very much at the moment and am having a lot of early starts! Sometimes I don't even use the black end, the nude coloured end just does wonders for something so simple.


My lack of sleep also means this Simple Kind to Eyes Revitalising Eye Roll-On has been a lifesaver. This eye gel is so refreshing and reduces my puffy tired eyes. The roller ball means it is really cool on your skin.


I discovered the Garnier Micellar Cleansing Water online, after reading hundreds of blogs raving about it. I use quite a lot of eye make up so I am glad I've finally found a remover that doesn't make my eyes red and sore. Because this is water, it is so delicate which makes it perfect for sensitive skin like mine. While it is delicate, it still gets the job done, and I've had no panda eyes since using this product. Some people take their full face of make up off with this, and say it's amazing. I stick to my make up wipes still for my face. I've never used make up wipes on my eyes though because it tends to damage my eyelashes and pull them out. It was £5 for this huge bottle, which they claim lasts for 200 uses. I've been using this for about a month now and I'm only a third of the way through which I think is amazing! 


So while this isn't a beauty product like the rest, I had to mention them. These are some New Look Sandals which I picked up in the sale for £15. I mentioned them in a previous blog post, and now I've had the chance to wear them, I'm even more in love. I've barely taken them off. They are so comfortable yet the jewels mean you can wear them to formal occasions as well. I was a bit worried the jewels would fall out, but I've even crawled in these (don't ask!) and they are still intact. I think they have since sold out, so sorry to wave them under your nose!


Have you tried anything I've mentioned? What do you think of my purchases?

I'm still so completely amazed with how many blog views I've been receiving, it really means a lot to me that people take their time to read my thoughts.


Tuesday, 29 July 2014

NOTD: White Gel Nails


This morning I had by nails done and I am so pleased with them! I had finally grown my nails nice and long, but I've started biting again unfortunately. My cuticles were in desperate need of some TLC and my hands just looked a mess really. Peeling skin, bleeding and wonky nails, great!

I'm not a fan of acrylic nails myself. I think they look absolutely lovely on other people, but I think they do too much damage to your natural nails and are awfully expensive. In comparison, gel is beautifully shiny and my nails grow dramatically when I have it on. 

My friend Lucy owns her own mobile business, and I wouldn't let anyone else do my nails because she is just so amazing. She spent an hour in total giving them a thorough manicure, and painting them. She has a wide range of colours, but I have a white obsession at the moment so it wasn't a difficult choice!

This will last about 2 weeks, and at £15 she is the cheapest gel nail artist I know! And because she comes to your house, I find it so much more relaxing, which is surely the whole point of pampering! I thoroughly recommend her to anyone who lives locally to myself.

Lucy also does massages, waxes, tints, and so on! If anyone would like her contact details, message me.

Tuesday, 15 July 2014

How to remove glitter nail varnish

Warning: this blog post contains pictures of feet, apologies!

As an avid lover of nail varnish and all things sparkly, I can never resist glitter nail varnish. But while it looks amazing on, I used to dread taking it off. I would pick it off and scrub it endlessly, and it left me with really brittle and damaged nails. Until I started wearing gel nail varnish a couple of years ago, that needs to be set by an LED/UV Light. I figured because gel nail polish is taken off nicely via a soak-off method, I would try something similar with glitter nail varnish.


What you will need
Normal nail varnish remover
Cotton pads (I've ran out so I'm using ripped up kitchen roll in the photos below - classy!)
10 strips of kitchen tin foil


1. Soak your cotton pad in nail varnish remover. Place the cotton pad over the top of the nail. I usually cut 5 cotton pads in half as cotton pads are quite large for each nail. 

2. Wrap one of your strips of kitchen foil around the nail and secure it fairly tightly. People ask me why I use foil - it doesn't have some weird scientific reaction or anything, it just holds the nail varnish remover on the nail to soak it off.

3. Leave for 5-10 minutes. Remove the foil and just wipe the nail varnish away. It will be fairly soft and mushy - if it isn't, wrap the nail back up and wait a little longer.

And that's it! I'm not going to upload any photos after I'd taken the foil off, because I can't stand bare toe nails. This technique doesn't damage your nail like picking glitter nail varnish off, or scrubbing at it. 

I hope it works for you as well as it seems to do for me. Long live glitter nail varnish!4

Monday, 14 July 2014

Leopard print nails

Unfortunately, my floral and spotty nails were chipping already, so I opted for another change of nails - leopard print! It is one of the easiest and quickest designs I paint, and makes a change from how I would usually have my nails. Leopard print can be done in any colour, but I personally love the natural feel of the traditional leopard print.


What you will need:
Nail varnish remover
Cotton pads and cotton earbuds
Base and top coat (I'm using Rimmel's Nail Nurse Nail Rescue as my nails are fairly brittle at the moment)
A nude colour varnish (Barry M GNP 10 Lychee 313)
A brown nail varnish (Barry M 310 Mushroom 117)
Dotting tools (or the end of a pen lid or hair grip)
A black nail art pen


1. First of all I like to tidy my nails up. I suffer with really dry and excessive cuticles, and so I rub in CND Solar Nail and Cuticle Oil most days, but I also use Sally Hansen's Gel Cuticle Remover. I leave it on for 5 minutes and then push my cuticles back gently with an abrasive cuticle stick. I then apply my base coat to protect my natural nail from the polishes.

2. I then apply two coats of the nude colour nail varnish.


3. I then drip a large dot of the brown nail varnish onto my board (you can always drip it on cling film or paper - anything you don't mind getting dirty - the advantage of cling film or paper is you can just throw it away). Then, using a dotting tool (or pen lid or hair grip) I then cover my nails in dots. 

4. Using a black nail art pen, I then go around the brown dots. If you don't have a steady hand, this nail art is perfect for you! I deliberately make my hand a little shaky, as I think the leopard print looks better when the black outline isn't perfect. Don't do full, neat circles around each dot. Do two semi circles around each brown dot, or leave little gaps in the circles you make. If there are gaps on your nail, do a little dot in the black nail art pen, just to fill the space. It's difficult to explain but super easy to do. I've included a close up photo below


I'd love to hear feedback about my blog so far - I'm just doing a little bit of everything 'Shannon' at the moment, but if there is anything in particular you are enjoying, I'd love to know! Also, if anyone could recommend any nail art techniques, I would love to try them!


Friday, 11 July 2014

Vintage Nail Art

So I fancied yet ANOTHER change of my nails today. I am going to a Vintage Fair on Sunday, and so decided to go along the 'Vintage' theme. This is one of my regulars, I always receive so many compliments on it and I think it is just so pretty. I think these colours work really well together so I've listed which colours I've used in case any of you want to try this, but obviously you could use any you wanted. You could do all roses, or all dots, or arrange them however you wish of course! 


What you will need:
Nail varnish remover
Cotton pads
CND Solar Nail and Cuticle Oil
Base and top coat (I'm using Rimmel Nail Nurse Nail Rescue as my nails are really brittle)
White nail varnish (Barry M 66 Matt White 250)
Green nail varnish (Barry M Gelly GNP 3 Watermelon 242)
Light Pink nail varnish (Barry M Gelly GNP 11 Dragon 315)
Light Blue nail varnish (Barry M 317 Blue Moon 306)
Red nail varnish (Barry M 262 Bright Red 338)
Dotting tools (or you could use the end of a hair grip or pen nib)
Nail art brush

1. First I always give my nails a quick tidy. I file them slightly, apply CND Solar Nail and Cuticle Oil (which is SO good for strengthening nails and encouraging growth) and then I apply my base and top coat to protect my natural nail.

2. Apply two coats of your light blue colour - don't make them too thick because you are going to be having other layers on top. 


3. I then take my dotting tool and dip it in the pink nail varnish, and apply several dots to the nails I want the roses on. When dotting, I spread a little of the nail varnish on my board as you can probably see in the photos, or you could spread it on cling film, or anything you don't mind getting messy. It's easier than having to keep unscrewing the nail varnish and means you don't get too much on the dotting tool. TIP: DON'T APPLY TOO MANY PINK DOTS. TAKE INTO ACCOUNT YOUR NAIL SIZE. There is lots of detail to add to complete the roses!


4. While this is drying, I turn to the nails I want dots on. I spread some white polish on my board, and dot the white on with my dotting tool.


5. I then go back to the nails with the roses on. I spread some red nail varnish on my surface, and dip the nail art brush in. The finer the brush the better it looks I think, especially if you have tiny nails. It's difficult to explain this, but it's really really simple. Around the pink dots, just do some 'c' shaped lines. Do some starting from the middle of the pink dot moving outwards around the pink, and then do some just around the outside of the pink. I've included a close up photo of the roses - they don't particularly look like roses up close, but then you can get the jist of what I mean and how you can achieve the look!


6. I then clean the nail art brush, and spread some of the green nail varnish on my board. Then using the nail art brush, I do one or two little flicks of green coming from the roses. If you have small nails, just do the one. 


I then apply my top coat and ta-dah! You have Vintage style nails. As I said, you could do all roses, or you could do all dots with roses on just the one finger, or whatever you like. I think these are quite Cath Kidston-y. They are so so pretty and I hope you like them as much as I do!


Related Posts Plugin for WordPress, Blogger...